

Learn how to remove a camera lens protector safely and easily without damaging your lens. Step-by-step guide for all lens types and protector styles.
1. What are camera lenses?
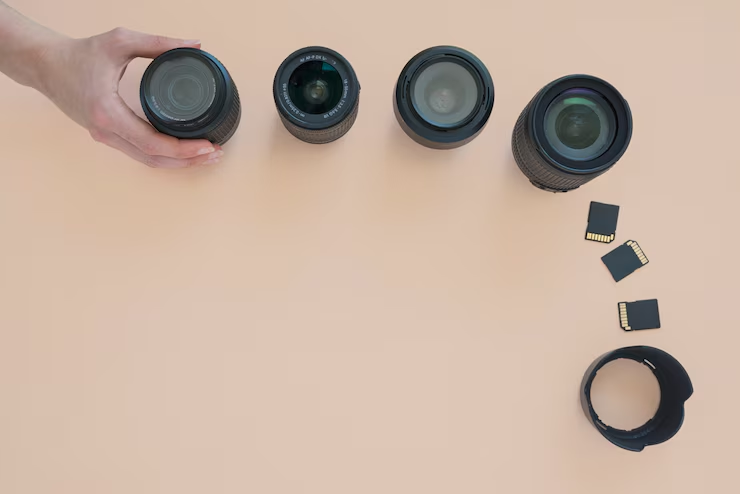
A camera lens protects light from the picture sensor (in digital cameras) or film (in customary cameras). It assembles and shines light beams reflected from a scene, taking into consideration the formation of pictures. The camera lens can consist of numerous glass or plastic components organized inside a barrel.
What is a Camera Lens Protector?
A camera lens protector is a straightforward cover commonly made of solid materials like safety glass or plastic, intended to protect the camera lens from actual harm like scratches, soil residue, and effects. It goes about as a barrier between the focal point and outer components without fundamentally affecting the quality of the photos.

2. What are the key features and functions of a camera lens protector?
- Scratch Opposition: The protector keeps the lens from being scratched by sharp objects, which can happen during handling or storage.
- Impact Protection: It offers protection against accidental drops or knocks, which could otherwise damage the camera lens.
- Dust and Dirt Prevention: Lens protectors prevent dirt, dust, and smudges from directly affecting the lens, keeping it clean and preserving image clarity.
- Water Barrier : Many protectors are intended to repel water or decrease the effect of water exposure
- Optical clarity: High-quality lens protectors are designed to keep up with the optical clarity of the lens, guaranteeing they don’t corrupt the nature of the pictures or recordings captured.
- Lens Mounts
- Many single-lens reflex (SLR) cameras, as well as some rangefinder cameras, feature detachable lenses. Other camera types, such as Mamiya’s TLR cameras and medium format models like the RZ67, RB67, and 645-1000s, also support interchangeable lenses. Additionally, other companies producing medium format equipment, such as Bronica, Hasselblad, and Fuji, offer similar systems for lens interchangeability. Mirrorless interchangeable-lens cameras also fall into this category. Lenses are mounted to the camera via a lens mount, which typically includes mechanical linkages and often electrical contacts that facilitate communication between the lens and the camera body.
3. What are the types of camera lens protectors?
Types of Camera Lens Protectors
- UV Filters
- Purpose: Originally used to block ultraviolet light, they now primarily serve as a protective layer for the lens.
- Benefits: Protects against scratches and dust while allowing light to pass through without significant alteration to image quality.
- Skylight Filters
- Purpose: Similar to UV filters, these are designed to reduce the blue cast in outdoor photography.
- Benefits: They help maintain natural skin tones and also protect the lens from environmental elements.
- Protection Filters
- Purpose: These clear filters provide a basic level of protection for the lens.
- Benefits: They help keep the lens clean and shield it from impacts and scratches without affecting image quality significantly.
- Snap-On Lens Caps
- Purpose: Used when the camera is not in use to prevent dust and scratches.
- Types: Available in front and rear caps; front caps are more common for protecting the lens.
- Lens Hoods
- Purpose: While not a direct protector, they shield the lens from stray light, reducing glare and potential damage from accidental bumps.
- Types: Petal-shaped for wide-angle lenses and cylindrical for others.
- Tempered Glass Protectors
- Purpose: These are made from durable glass that adheres directly to the lens surface.
- Benefits: They provide high scratch resistance and can enhance image clarity while protecting against impacts
4. Common Lens Sizes and Specs
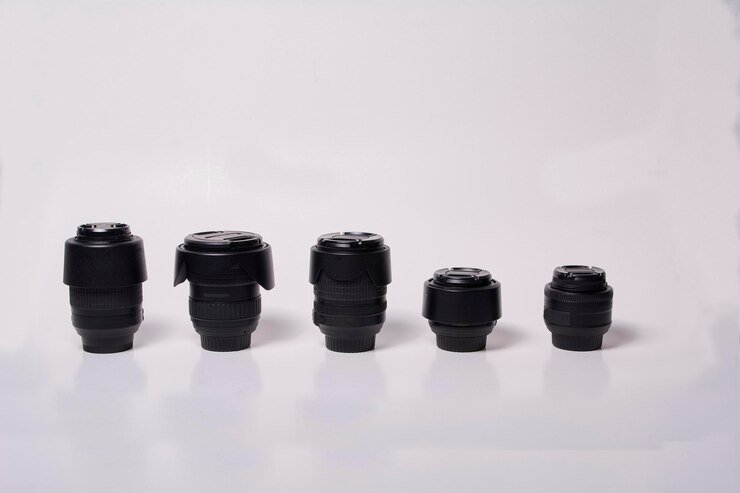
16mm Lens
- Angle of view: Very wide
- Description: Very wide view of the world. Great for landscape photography.
- Depth of field: Everything is in focus. It is impossible to have a shallow depth of field.
- Distortion of space: Makes things seem farther away than they actually are. Exaggerates the size of anything very close to the camera.
35mm Lens
- Angle of view: Wide
- Description: roughly what a cell phone would capture. Great for street photography.
- Depth of field: Pretty much everything is in focus unless your subject is very close to the camera.
- Distortion of space: Less spatial distortion than a very wide lens, but it still makes things seem farther away than they actually are.
50mm Lens
- Angle of view: Normal
- Description: Roughly the way the human eye sees the world. Good for just about any type of photography.
- Depth of field: Easy to have a shallow or deep depth of field, depending on aperture range.
- Distortion of space: very little or none.
85mm Lens
- Angle of view: Medium telephoto
- Description: Great for isolating a subject from the background. Good for portrait photography.
- Depth of field: Easy to get a shallow depth of field.
- Distortion of space: Makes things seem closer than they actually are.
200mm Lens
- Angle of view: Telephoto
- Description: Ideal for picking out a distant subject the way a telescope does. Good for compressing your subject and the background.
- Depth of field: Quite often has a shallow depth of field unless everything you’re shooting is quite far away.
- Distortion of space: Makes things seem significantly closer than they actually are.
5. How to remove the camera lens protector?
Steps to Remove a Camera Lens Protector
- Gather Your Tools
- Hair Dryer or Heat Gun: To soften the adhesive.
- Plastic Spudger or Credit Card: For prying up the protector.
- Tweezers: To grip and pull off the protector once it’s loosened.
- Apply Heat
- Set your hair dryer to a low-intensity setting. Hold it a couple inches away from the lens protector and apply heat for around 30 seconds to 1 minute.
- Lift the Protector
- Use the plastic spudger or credit card to gently insert it under one corner of the lens protector. Be careful not to scratch the lens. If you feel resistance, apply more heat and try again.
- Pry Off the Protector
- Once you have lifted a corner, slowly work your way around the protector, gently prying it up as you go. If it’s still stuck, reapply heat as needed.
- Remove Completely
- Once loosened, use tweezers or your fingers to carefully pull off the protector. Make sure to do this slowly to avoid any damage.
- Clean Up Residue
- After removal, check for any adhesive residue left on the lens. You can use a small amount of isopropyl alcohol on a soft cloth to clean it off gently.
- Final Check
- Inspect your camera lens for any scratches or damage before using your device again.
Criteria for Selecting Camera Lenses
You need to take several factors into consideration when selecting a camera lens:
- Purpose (portraits, landscape, sports, architecture)
- Focal Length
- Speed (1.4, 2.8, 4.5 f)
- Format (Cropped APS-C or Full-Frame)
- Quality
- Features (image stabilization, silent autofocus)
- Budget
Conclusion
Protection from Physical Damage
Lens protectors help safeguard camera lenses from scratches, dust, moisture, and impact—especially in harsh environments like sand or water. While some believe they affect image quality, high-quality protectors typically have little to no impact on clarity. Most screw on easily and stay in place during regular use, offering peace of mind while shooting. Some filters, like UV or clear glass, are purely protective, while others—like polarizers and ND filters—enhance image quality in specific ways.
Here you can take an overlook to another category of camera (Wyze Blue Camera)

